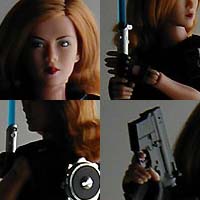
| 12" Mara Jade | |||
|
|
|
Blaster - take the machine gun and take off all the detachable parts and cut off the front and back (it's really obvious where). Then file the ends a little. Belt Buckle - paint the VCR button label
silver (use white to prime). Cut and fold a piece of metal that
will then be glued to the unpainted side. You'll be able to clip
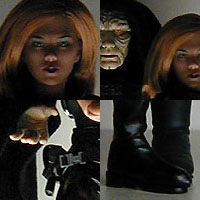
it right onto a belt. Blaze's Hair - I cut it to just below the shoulder. Shirt - I just cut the top and bottom of the short sleeves and tucked them inside. Pants - Cut off the buckle that it came with, but NOT the belt. Harness / backpack - You'll need 2 Cy girl belts, plastic washers, screw, nuts, and that piece of plumbing (that I don't know the name of). Here are the pieces in order of assembly. You'll be able to place the belts into the notches you've cut out of the one washer and tighten the nuts as necessary, like this. Is it too big? Yes, but it looks cool. Holster and Belt - This is a little too complicated to explain. But I will say you need 2 Cy Girls leg holsters, some thread, and superglue to make it. Bring it all together - Unscrew boot bottoms. Pull on pants 3/4 of the way. Put on shirt and tuck into pants. Hook the pants up tight. Pull on boot covers and screw on boot bottoms. Switch plain hands with gloved hands. Put holster belt through one pant loop on HER left side so it hangs down on her right side, tighten or loosen for effect. Place backpack on and tighten as necessary. Clip on your custom buckle to the pants' belt. Comments: Mara was pretty easy to put together. Basically, without Cy Girls she just isn't possible. I've seen the "Barbie Doll" type and some others and they just don't cut it for me 99% of the time. Why didn't I make the white scarf/hood? Synthetic hair gets a static charge very easily. Once that happens you'll always be struggling to get it back the way it was. Also, compare the photos I took. It's amazing what changing the lighting will do to your figures' look. |
|
NEWS | FIGURES | CARDS | LINKS | CONTACT
© 2001 Keith A. Paquette

